...
| Expand | ||||||
|---|---|---|---|---|---|---|
| ||||||
Contener connection and selection
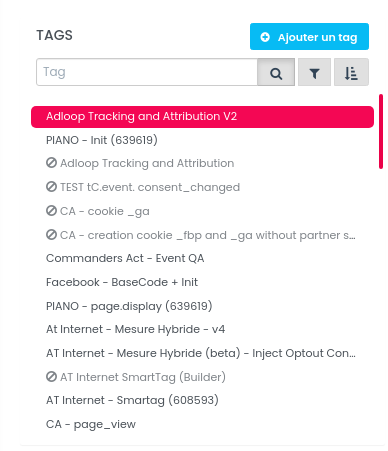
Tags template selection 
Template edition Fill in the 3 following fields:
  Consent
Publishing
In the case of the a single tag for initialization If you use a single tag for initializing your analytics solution and for sending the page view event, then simply place the Adloop tag before your Analytics tag and modify your Analytics tag to include the code for populating the custom dimension. Below is an example of how you can implement it with Google Analytics 4 (add line 2 and 6 in your GA4 code) : 
 There are two ways to set up the custom dimensions:
There is function that you can call anywhere you want. This function automatically fills the custom dimensions when using GTAG, GA or PA analytics objects.
In case of a specific setup, it is also possible to set the custom dimensions manually. The Adloop dimensions values are stored in a variable called (you write this in the console debugger of your browser if you want to see what’s inside) :
For example (in this case, the example implements the queue system of Piano, ‘paq’) :
Notes for debugging: There are some debugging logs for this new feature, that you can access in the console debugger of your browser. For you to be able to see it, you need to create a new cookie for the website that you are setting up (using a browser extension, like Cookie Master)  The cookie must be named “ With this cookie, you will see that kind of logs : 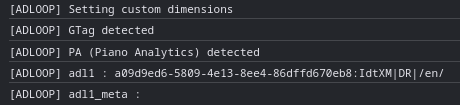 |
| Expand | ||
|---|---|---|
| ||


 adloop_click_1 and for the value select the first user defined variable you created previously using the brick button adloop_click_1_meta and for the value select the second user defined variable you created previously using the brick button  Note: the name of the value between {{ }} depends on how you named your user defined variable ; it might be different from the screenshot above.
 |

...
The verification of the script is very easy and will take only a couple of minutes.
On the GTM If you have a preview mode, access your website.use it before publishing !
Click on the F12 button of your computer or right-click > Inspect to open the Console and go to the Network tab. In the filter box, type “collect?”
...
:
collect? if you use GA4
xiti if you use Piano Analytics
...
Then reload your page using CTRL+R, still with the Console being open.
Find the line with “pageview” in it and click on it to open it.
...
the first hit (pageview) after accepting the cookies.
...
In the Payload tab, scroll down until you find the list of custom dimensions. They are indicated as cd1, cd2, cd3 etc. Find the custom dimension (s) that you created for Adloop.
...
:
ep.adloop_click_1 for GA4
adl1 for Piano Analytics
Now, the custom dimension that you created should be filled with an Adloop code, that looks like this:
1ed2bf2f4a7be6b2-2e48-17064879-47ff-c3c8-1865373dcd9a:Ep0hc|DR|/
If you see the Adloop code, you can publish our script !
If your custom dimension is not filled with a value, then there is something wrong with the script8756-d5ecdb16c195:JGMaP|SOu|GG:/fr-fr/
Check the value between the first two | | :
If you came through a natural search engine result : |SOu|
If you came through direct : |DR|
If you came through a link with tracking parameters : |UN|
Check several pages of the website, the custom dimension should be triggered and populated for each page view. Try also to trigger a couple of events, our custom dimension should be triggered and populated for each as well.
If that is not the case, check the set-up of the tag. Check carefully once again that you followed every step of our Adloop script installation guide. You can also contact our Customer Success team that will be able to assist you with the script installation!
If all seems good, you can publish our script.
There is another alternative way to check if your script Is being triggered
...
| Expand | ||
|---|---|---|
| ||
Open the Data Query section of Piano Lines : the Adloop custom dimension you created, Events Columns: Events Date: From the first full day of data-collection Be careful to display N/A lines  Compare the number of events attached to an Adloop value to the global number of events on your website for each event. The amount of N/A for each event has to be very low. The amounts should be very close - we allow a tolerance of 5%. Please note! If Piano works in consent mode, please filter the data to only compare when consent is given. Otherwise, since Adloop can only work with the consent of the user, you won’t have the same basis for data comparison. |